Showing posts with label New Features. Show all posts

Thursday, August 28, 2014

Shortest Distance comes to BIM 360 Glue

If you haven’t opened up BIM 360 Glue (desktop application) in a few weeks, an update was published and Glue now has a new Measure Tool….Shortest Distance!  This was one of the tools I couldn’t believe Glue didn’t have when I first started working with Glue and coming from using Navisworks.

A much welcomed addition!!

image

Tuesday, July 15, 2014

Latest Update to BIM 360 Glue–Clash Status and Markup

If I have a dollar for every time someone asked me if Glue had a status for it’s clashes I’d be writing this blog from a beach in Maui…ah, who am I kidding, I wouldn’t be writing this blog Smile

Anyway, I won’t be (theoretically) collecting those dollars anymore! The latest update to BIM 360 Glue is the introduction of Clash Status.  You can now mark your clashes to be Open, Ignored or Closed and fixed clashes will now become Resolved instead of being removed.  As for Ignored & Closed status, here’s an explanation from the Help

Clashes can be marked as "ignored" by the team members working on the merged model. Only admins can "close" clashes, providing a more formal level of control for the VDC/BIM manager. Clash status can be changed back to "open" if needed. Glue recognizes if a clash from a previous version has been fixed. If the clash no longer exists, it will be automatically marked as "resolved."

image

Another update is the ability to add a Markup directly to the Clash.  In the past, you could kind-of do this, but it was held as a Markup outside of the Clashes. Now you can just select a clash and add a Markup to it.  The nice thing about the Markup in Clash is that it also adds a Markup to the Markup “tool”, so even Clash Markups can be viewed with the iPad app!

Note though, if you use the Filtering/Grouping, you can’t add a Markup to the Group, you have to pick individual clashes to add a Markup.

image

Oh, one more thing….these updates are available to ALL projects, new or old.  Old projects (old meaning before July 11, 2014 basically) will prompt you for an update when you go into your Clash Test.  It does a “one time update” and then you have the new functionality!

Thursday, March 27, 2014

What’s New in Navisworks 2015

Wow, time has flown this year, the 2015 Autodesk products have been announced!

In regards to Navisworks, here’s my highlights of the new features for 2015…

  • 2D Quantification Tools (Incorporating similar tools that were in QTO)
  • 3D Quantification Improvements
    • Property Mapping now available (similar functionality was in QTO)
  • Autodesk Rendering Enhancements
    • Navis get’s cloud rendering!
  • ReCap/Point Cloud Improvements
    • Navis has new ways to “convert” the point cloud, which will help with performance and being able to select portions of a point cloud.
  • Redline Toolset now includes and Arrow tool (finally, no more manual arrows!)

This isn’t an all-encompassing list, just a few highlights.  As I get more time to actually get into some of the new features, I’ll report back Smile

Thursday, April 4, 2013

Navisworks 2014 gets QTO

As you’ve probably seen in the new features list, whether it was here on my blog or over at Beyond Design, Quantification has come to Navisworks 2014.  I’ll be doing posts on the new Quantification features in the future, but wanted to get one thing out that I know is going to be asked…does it only come with Manage?

NO!

Whether you use Simulate or Manage, you will have the ability to use the Quantification tools within Navisworks 2014.

Tuesday, March 26, 2013

What’s New in Navisworks 2014

Ah, the spring time (in the United States anyway) when the weather starts to change (unless you live in the Midwest like me, still feels like December!) and Autodesk rolls out the new products.  Navisworks has some nice features in 2014 and this should be an interesting year talking to customers about the new features.

The guys over at Beyond Design put together a nice little list of the key features in Navisworks 2014.  You can read their post HERE.

Taking a step away from the key features they show, here’s a little list (not a complete list) of some of the other things you’ll see in Navisworks 2014…

  • Timeliner Selection Set Export
    • This is interesting…you can export your Task List to create a folder of Selection Sets that match the name of the Tasks.  The Sets are then automatically attached to the Tasks. At this point, you’d need to add items to each Selection Set.
      • This should make attaching/mapping objects to tasks much, much easier!
  • Timeliner Format Update
    • You can now utilize Primavera P6 v8.2! (this was a big issue with 2013)
  • Preserve Clash Highlighting in Viewpoints reporting
    • A feature that sneaked into 2013 via SP2 was the ability to save your Clash Report to Viewpoints and keep the visual fidelity of the Clash View. Well, it’s native in 2014! You even have the ability to choose if you want that functionality via a checkbox.  It even keeps the Redlines! (which it didn’t in 2013)
  • Clash Elements Different Colors
    • Basically, you can set Item 1 and Item 2 to be different colors instead of them both using the Clash Status color.
  • Clash Comments
    • The Clash Results now include a column that shows if a Clash has a Comment and how many.
  • Clash Filters
    • You can filter the Clashes to only show what you currently have selected.  New for 2014…
      • Exclusive – if you have the 2 clashing elements selected, this will show clash results where both of the clashing items are included in your current item selection.
      • Inclusive – if you have 1 or 2 clashing elements selected, this filter will show clash results where one or both or the clashing items are included in your current item selection.
        • I can see people using the Inclusive quite a bit.
  • Clash Report Filter
    • If you have a Filter applied to your Clash Results, you can export a Report of just the Filtered Clashes.
  • Clash Isolation Settings
    • The Dim Other and Hide Other are no longer part of a drop-down menu, they are buttons next to each other.
  • Measurements (Nice enhancements here!)
    • We can now do measurements were we can lock the X, Y or Z axis from the first point selected.
    • We can now measure in a Perpendicular (huge!) or Parallel alignment to the surface of an object.
      • I’ll definitely be doing a video for this one soon!
    • We also get some new visual cues when selecting a Face (small rectangle behind the cursor), Edge (small line behind the cursor) or Point (an “X” behind the cursor).
      • The visual cues replace the cursor changing, the cursor now keep a “+” as it’s graphic.
  • Rendering
    • Wow, there sooooo much to this now that we can use the same Materials as the other Autodesk software and the same rendering engine.
    • We also get the Ray Trace tool that was introduced in Revit 2013.
  • Sectioning
    • You can now “limit” your sectioning planes/box to elements you have selected.
      • Oh, this is nice when you want to show a section cut and the limit to be 1st Floor to 2nd Floor!

So throw list together with what the guys and Beyond Design have (Quantification, Rendering, ReCap (point clouds), etc.) and that’s pretty much what your going to see in Navisworks 2014!

Oh, I should note…Clash items listed above are only available in Navisworks Manage, everything else will be available in Navisworks Simulate as well.

More to come soon once I get Navisworks loaded on my main computer Smile

Tuesday, May 29, 2012

Navisworks Journal Files

A little while back, I was going through removing my 2013 “stand-alone” products so I could install the Building Design Suite Ultimate 2013 and ran across a folder I didn’t remember seeing in 2012…a Rx folder within an Autodesk folder in my Users directory.  Huh, so I opened it up and there lies a Navisworks 2013 folder…with a Journals folder within it.  Now this is interesting…are they somehow introducing Journal Files for Navisworks like Revit has??

Well, no, not really. From what I can tell, a Journal file is generated when you Append/Open a Revit file in Navisworks 2013.  This Journal file appears to be (my opinion anyway) a “record” of what Navisworks is doing in the background when reading the RVT and creating the NWC. 

SNAGHTML1031836

And in case you are curious or want to investigate a Revit Journal file that was created when you Appended a Revit file into Navisworks, this is the location it’s located in (Windows 7)…

C:\Users\*USERNAME*\AppData\Local\Autodesk\Rx\Navisworks 2013\Journals

So if you are having issues when loading/Appending in a Revit file into Navisworks 2013, you may want to check out the Journal file to see if there is anything in the Journal that’s pointing to the problem.

Tuesday, May 22, 2012

Vault and Navisworks 2013

Here are just a couple of the changes that I noticed with Navisworks and Vault 2013…

Yay, we can finally Append from Vault ALL of the file types for Navisworks!

SNAGHTMLac50ff

Navisworks 2013 also now includes a Vault Browser window that will show which files are currently Appended into Navisworks, just like the Selection Tree, but will give some indicators that are shown in Vault.  It will also show which files have been Appended from Vault vs a “regular” Append.

image

The circles that are in front of the file names are the indicators…these will show a few different things.  In the image above, the + sign is indicating that the file is not in Vault.  The empty circle is indicating that this file is in Vault as was Appended via the Vault tools.  There are more, which get’s into more of the Vault functionality…which is a whole other discussion.  Anyway, here’s what the Vault Browser would look like with the files in Vault, Appended from Vault and working on a “checked out” NWF file…

image

Friday, April 20, 2012

Update to Switchback with Revit 2013

I’ve posted a couple times now about the Switchback feature in Navisworks and how it works with Revit.  Well, there is an update to the functionality for the 2013 release in a good way!

When you now use Switchback with Revit 2013, the camera view that you are using in Navisworks 2013 is now created in Revit…literally.  When in Revit, you’ll be directed to a new 3D View called “Navisworks”.  The nice thing is you don’t have to create this view, it happens automatically.  So if you rename or remove the “Navisworks” 3D View and use Switchback again, you’re going to get another “Navisworks” 3D View in Revit.  This is much, much better that what we got in 2012 where the camera didn’t change much in Revit, or maybe just went to a plan view.

Another change is that the object that you’ve selected in Navisworks 2013 to run Switchback with will now actually be selected in Revit 2013 and show the Properties!  Revit 2012 almost had it, but you had to do a few things to make the properties actually show even though the object was “selected”.

One thing though with the object selection potion of this…your results are going to vary depending on what you have your “Selection Resolution” set to.  When I first tried it, I had the “Selection Resolution” set to “Last Object” and the object selection in Revit wasn’t showing.  So I went back and tried the other options for “Selection Resolution” and the one that you want to use is “First Object”.  By using this “Resolution”, the Revit object will be highlighted and the properties of the object will be available.

Here’s a little video showing the new functionality of the Switchback feature for the 2013 products…

Navisworks and Revit 2013 Switchback

One thing to note for those using Revit 2012 and Navisworks 2013…you have the ability to use Navisworks Switchback 2013 in Revit 2012, but the functionality of the Switchback will be the 2012 functionality.

Thursday, April 19, 2012

Navisworks 2013 Selection Tree Changes-Similarities

With the ability to now read Revit files, another change with Revit files is how they are organized in the Navisworks Selection Tree.  In the screen shot below, I’ve laid out some examples to illustrate the differences from 2012 Revit based NWC files (2012 and 2013 NWC), Revit 2013 NWC and Revit RVT files…

image

As you can see, Revit 2012 will export to a 2013 NWC file, but the organization stays the same as if it was exported to a 2012 NWC file.  So the new organization (of Level->Family Category->Family Type->Instance) is only going to show up when a RVT file is read directly into Navisworks, or you generate a NWC file from Revit 2013.

One thing to note with the above image, it doesn’t show an Append 2012 RVT file (oops).  I can say that it will show just like a Revit 2013 RVT file as shown below…

image

UPDATE:

Based on a comment I received, I didn’t notice the 2013 RVT and NWC files were named the same.  Since I didn’t refresh the NWF, it probably didn’t matter.  But to be safe, I re-appended the files with different names and the RVT and NWC show the same “structure” of Level, Category, etc. I did however notice that the exported NWC breaks down the Instances a step further than the RVT. Here’s the screen shot…

clip_image002

I didn’t look that closely at the tree before to notice this difference with 2013 Exported NWC’s and RVT’s. The NWC Export Settings and Revit File Reader options are the same, so this is something I want to look into further…

Revit File Reader Options

As I’m sure everyone is aware, Navisworks 2013 can read a Revit file natively.  While this is a nice new feature, I have one “compliant” I would like to file…

Why are the Options different when looking at the Export Options from Revit vs. the File Reader Options in Navisworks?  They aren’t totally different and quite honestly it doesn’t matter since everything is present, but why aren’t the laid out the same??

Here’s the Navisworks 2013 Revit File Reader Options…

SNAGHTML58cd10

And here’s the Revit NWC Exporter Options…

SNAGHTML5953bc

Again, is this a big deal…no.  But, it’s just something caught my eye and to me doesn’t make sense since Navisworks didn’t have the options in the first place.

Oh, and one other thing…you can’t Import/Export the Options from Revit to Navisworks and vice-versa.  The Import only works within the same Options dialog/platform.

Wednesday, April 4, 2012

Navisworks 2013

Wow, the first part of 2012 has been a busy one!  As you are all probably already aware, the Autodesk 2013 products were introduced on March 27.  Instead of relisting the New Features for 2013, I’ll point you to Paul and Lee over at Beyond Design.  They have a nice list of the new features as well as a couple new posts about some of the features, like Grids and Levels!

As I get some more face time with Navis 2013, I’ll be posting about some of the new features that have been presented and ones that maybe weren’t as “advertised”.

Tuesday, July 19, 2011

Navisworks Switchback to Revit

New in Navisworks 2012 (Simulate and Manage) is the ability to utilize the Switchback feature!  This has been accessible/available to those working with AutoCAD for a while now, but it’s a nice addition to those working with Revit.  I’ve received a few questions about working with Revit Switchback and whether or not you have to export the NWC from the central file or local files?  And if local, how does it know what local file to get and how is it going to get a local that’s on someone else’s computer!?

Ok, well, you don’t have to export from the central and it doesn’t matter what local file you export your NWC from.  The nice thing about Revit Switchback is that is goes strictly by the ID number of the Revit objects…so it doesn’t care what (local) file it’s from.  And as far as what file it will try and open, well, it will look initially for the file the NWC was produced from.  But, not to panic, you will be prompted saying that it can’t find the file and allows you to browse for a new file….your own local file.

The key part about Revit Switchback from the Revit side is that you already have the file open and you’ve initiated Switchback in Revit. 

How do you do this?  Great question, glad you asked! Smile

In Revit, go to the Add-Ins tab and External Tools.  There, you’ll find Navisworks Switchback.

image

Once you’ve selected Navisworks Switchback, you can now utilize Switchback in Navisworks with Revit.  The nice thing, is that you only have to do this once per Revit session.  So if you have Revit open all day, you only have to initiate the Switchback in Revit once.

I have to say though….as much as I like this, there is some work to be done with this feature.  It’s the first iteration, so I expected there to be some little things to work-around, but I guess I also expected this to work similar to AutoCAD and it doesn’t.  I’m creating a little video explaining some of the things that I’ve found that need work, including some of the things I’ve found to get around some of the issues.  Stay Tuned!

Friday, June 3, 2011

BIM and Construction Utilizing the Autodesk 2012 Products

Back in the first part of April, I did a few webcasts around the Autodesk 2012 products and how they fit into a BIM workflow for Architects and Construction firms.  We did record the sessions and I’ve linked below a recording of the BIM for Construction webcast that I did.  It’s about 40 minutes long and since this was done for the company I work for, you get a few minutes of MasterGraphics information at the beginning. 

Hope you enjoy and definitely contact me if you have any questions!!

BIM For Construction Utilizing the Autodesk 2012 Products

Friday, May 13, 2011

Navisworks and Vault Integration for 2012

The last couple days, I’ve been learning some of the ins and outs of how Vault 2012 can now work with the AEC 2012 products like Revit and Navisworks, besides just learning about Vault period.  Brian Schanen at Autodesk has a nice little post over at Under the Hood about this integration with Navisworks.

Here’s a little clip from his post about how to show the Vault tools in Navisworks…

----snip----

Now, here’s a tip that you’ll need to use before Vaulting Navisworks data. The Vault Ribbon tab is off by default. To enable, go to Options, expand Tools, click Vault, and put a check in the box to ‘Show in User Interface’.

Navis Vault enable

----snip----

Now, before everyone goes out and starts trying to show the Vault tools in Navisworks 2012, you’ll need Vault 2012 installed for this option to be available.

As far as how Navisworks and Vault work together, this is the first iteration of this integration and a specific workflow at this point hasn’t really been nailed down.  As I learn more about Vault and how it’s going to play with Navisworks, I will be posting more about this new integration.

Tuesday, April 26, 2011

New Symbol in Navisworks 2012 Generated NWC Files

As some of you may or may not have noticed, Navisworks (2012) generated NWC files (meaning you opened or appended say a DWG file) have a new symbol in the NWC name….the # symbol.  This is something new for 2012 NWC files and is meant to differentiate NWC files created as Cache vs. NWC files exported from other programs.

So when you see the # symbol in the file name, leave it there.  Navisworks doesn’t do anything special with the file or anything, it’s just a way to differentiate the files.  If you delete the # symbol, Navisworks will just recreate the NWC again with the # symbol. 

The reason behind this is in the past, there were cases where users would export their DWG files to an NWC file and place them alongside the DWG files in the same folder with the same file name. They would then open the DWG file in Navisworks, thereby overwriting the exported NWC file with an automatically generated NWC.  So by automatically putting the # symbol in the name, this issue should be avoided.

Thanks to Autodesk support for clarifying the new naming convention!

Tuesday, March 22, 2011

New Features for Navisworks 2012

Here’s a quick peek at the new Features for the Navisworks 2012 family of products…which is Manage, Simulate and Freedom Viewer.

Navisworks Manage and Simulate

  • User Interface Updates (Navigation Tools on Ribbon)
  • Timeliner Updates (Interface, Tab Integration)
  • Clash Detective Updates (Assign Clashes, Wireframe Mode, Batch Updates) (Only Manage)
  • 2D DWF & DWFx File Support Enhancements
  • Revit Interoperability (Linked Files, Construction Modeling support, Revit Switchback)
  • Vault Integration
  • Appearance Profiler (Assign Colors per Props, Import/Export)
  • Miscellaneous Enhancements (Avatars, FBX Materials)

Navisworks Freedom Viewer

  • Measurement tools
  • 2D DWF & DWFx
  • Gantt Chart Visible

As time goes on, I’ll be posting more about the new features, so stay tuned!

Thursday, June 17, 2010

Navisworks 2011 – Part 1a – Interface Items - Navigation

One of the items I wanted to touch on that I mentioned in the previous post about the new interface was the Navigation Bar (Nav. Bar).  The Nav. Bar can be located by default on the right side of the screen as shown below.

image

In the Navigation Bar, here’s what you’ll find for functions/tools…

Wheel functions  imagePan Tool image

Zoom Tools imageOrbit Toolsimage

Look/Focusimage    Walk/Fly Tools image

At the bottom of the Nav. Bar, there is a little arrow that will allow you to turn tools on/off, where you would like to dock the Nav. bar and even options for the Nav. Bar.

image

In the Options that you can set if you would like to utilize the classic orbiting/walk tools, or if you’d like to utilize the new 2011 versions.  In the image below, you can see that you can utilize the classic orbit and walk tools.  By having these checked, you’ll utilize the icons and have the same interaction that you’ve had for orbit navigations.

image

Now, by un-checking these same options, you’ll turn the orbiting and walking tools into the new functionality for 2011.  Basically what is going on here is that the functionality is the same, except that it’s more like using the tools from the Wheel.  As you can see in the image below, the orbit tools all look the same and utilize the pivot point set by the Wheel-Center tool.  They each function as they have in the past, so you still have 3 separate orbit tools.  As for the Walk, the feet go away and you now get an arrow.  Interesting thing about the Walk…the arrow is always based on a start point in the lower center of your screen.  This is unlike the “classic” Walk (with the feet) in that the Feet could be anywhere on the screen.

image

The Constrain Walk angle being checked, the Walk tool will keep the camera upright while navigating.  If it’s cleared, the camera will have the ability to roll (like the Fly tool).

The Use viewport linear speed check-box is pretty self explanatory.  If this is unchecked, it will use the value in the slider.  0.1 is very slow  while 10 is very fast.

And last, but definitely not least on the new Navigation modes…when you are in the Selection Mode (using the Arrow), you can now utilize your mouse wheel to pan, zoom and orbit…just like in other Autodesk products!!  I think I can speak for almost everyone on this….IT’s ABOUT TIME!!!

Wednesday, May 26, 2010

Navisworks 2011 – Part 1 – New Interface

So you’ve (probably) seen the list of new items Navisworks 2011, but I’m going to expand on this list in a series of posts.  This first post will focus on the new Interface in Navisworks 2011.

If you’ve been using practically any Autodesk product the past couple years, you’ve probably become accustom to the Ribbon interface.  For Navisworks 2011, the Ribbon is one of the first new things you will notice.  Below are some screen shots of the new Ribbon…

The Home tab of the Ribbon includes many of the features that were found in the Edit pull-down in 2010 and it also includes a Tools panel that allows the user to turn on certain tools (or Control Bars).  As in the other products, some Ribbon Panels have little arrows at the bottom to give the user access to additional tools.  Take the Select and Search Panel (shown below)…hitting the little down arrow expands the panel and allows the user to change the Selection Resolution on the fly, without having to go into Global Options (which has changed location…see bottom image)  This type of behavior is consistent throughout Navisworks.  As you can see in the image, if a tool has a blue background to it, the tool/control bar is active.  image 

For the Viewpoint tab, this is really the tools specific to working with a Viewpoint.  I don’t want to say there are a lot of new tools here, but there are some enhancements.  Take the big button for Save Viewpoint and the drop-down list for the Saved Viewpoints.  This allows the user to save and pick a saved Viewpoint without having to go to the Saved Viewpoints Control Bar.  Sure, you still have to go to the Saved Viewpoints Control Bar to give a new Viewpoint a name, but it allows easier access later on.  The other big item on the Viewpoint tab is the Enable Sectioning button.  This will open an extra tab just for Sectioning.  I’ll go into the Sectioning enhancements in a later post.image

The Review tab gives you the tools for Measuring, Redlines, Tags and Comments.  Not much in the way of changes for these tools.image

The Animation tab is really for turning on Animator and Scripter, plus playback capability.  You can get to the Record button in the Viewpoint tab, just hit the down arrow under the Save Viewpoint button.image

The View tab allows you to turn on the Navigation bar (again more about this in a future post), the View Cube, Workspace Saving and Loading, etc.  The Windows button is actually for turning on the various Control Bars. image

And last but not least, the Output tab.  This basically give you all of the Export, Print and Publish options.  It’s kind of nice not to have to go into the Application Button to get these options.  Don’t know what the Application Button is…see paragraph below. :)image

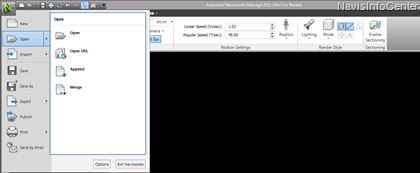
The Application Button/Menu in the upper left corner (or what I call the “Bin N”) get’s you into the “typical” New, Open, Print, etc.  You’ll notice that some have a fly-out which will get you additional tools/options.    And speaking of Options…I’ve gotten the question a few times already - “Where is the Global Options in Navisworks 2011?”  Well, you’ll see a button in the lower right of the App Menu called Options…this is where you get to the Global Options.image
So, that’s the new interface in a nutshell.  I’ll expand on a few items in the near future.  And speaking of the future…next on the list (other than expanding on the items stated above) is using the Classic interface!   Yep, I said it…there is a classic interface for Navisworks 2011.  And there are a couple “gotchas” with using the classis interface.